There are 4 gullies on the Yellowbelly Track in Shepparton Regional Park between Mooroopna and Toolamba. See map below.
The most important thing is for riders to expect the 4 gullies. Their locations are shown on the map to the right (north is at the top of the map).
- There are 4 gullies. Coming to a gully does not mean you are off course, or the gpx file is wrong.
- Riders have to negotiate these 4 gullies.
- It is not difficult to get through the gullies if riders know what to expect.

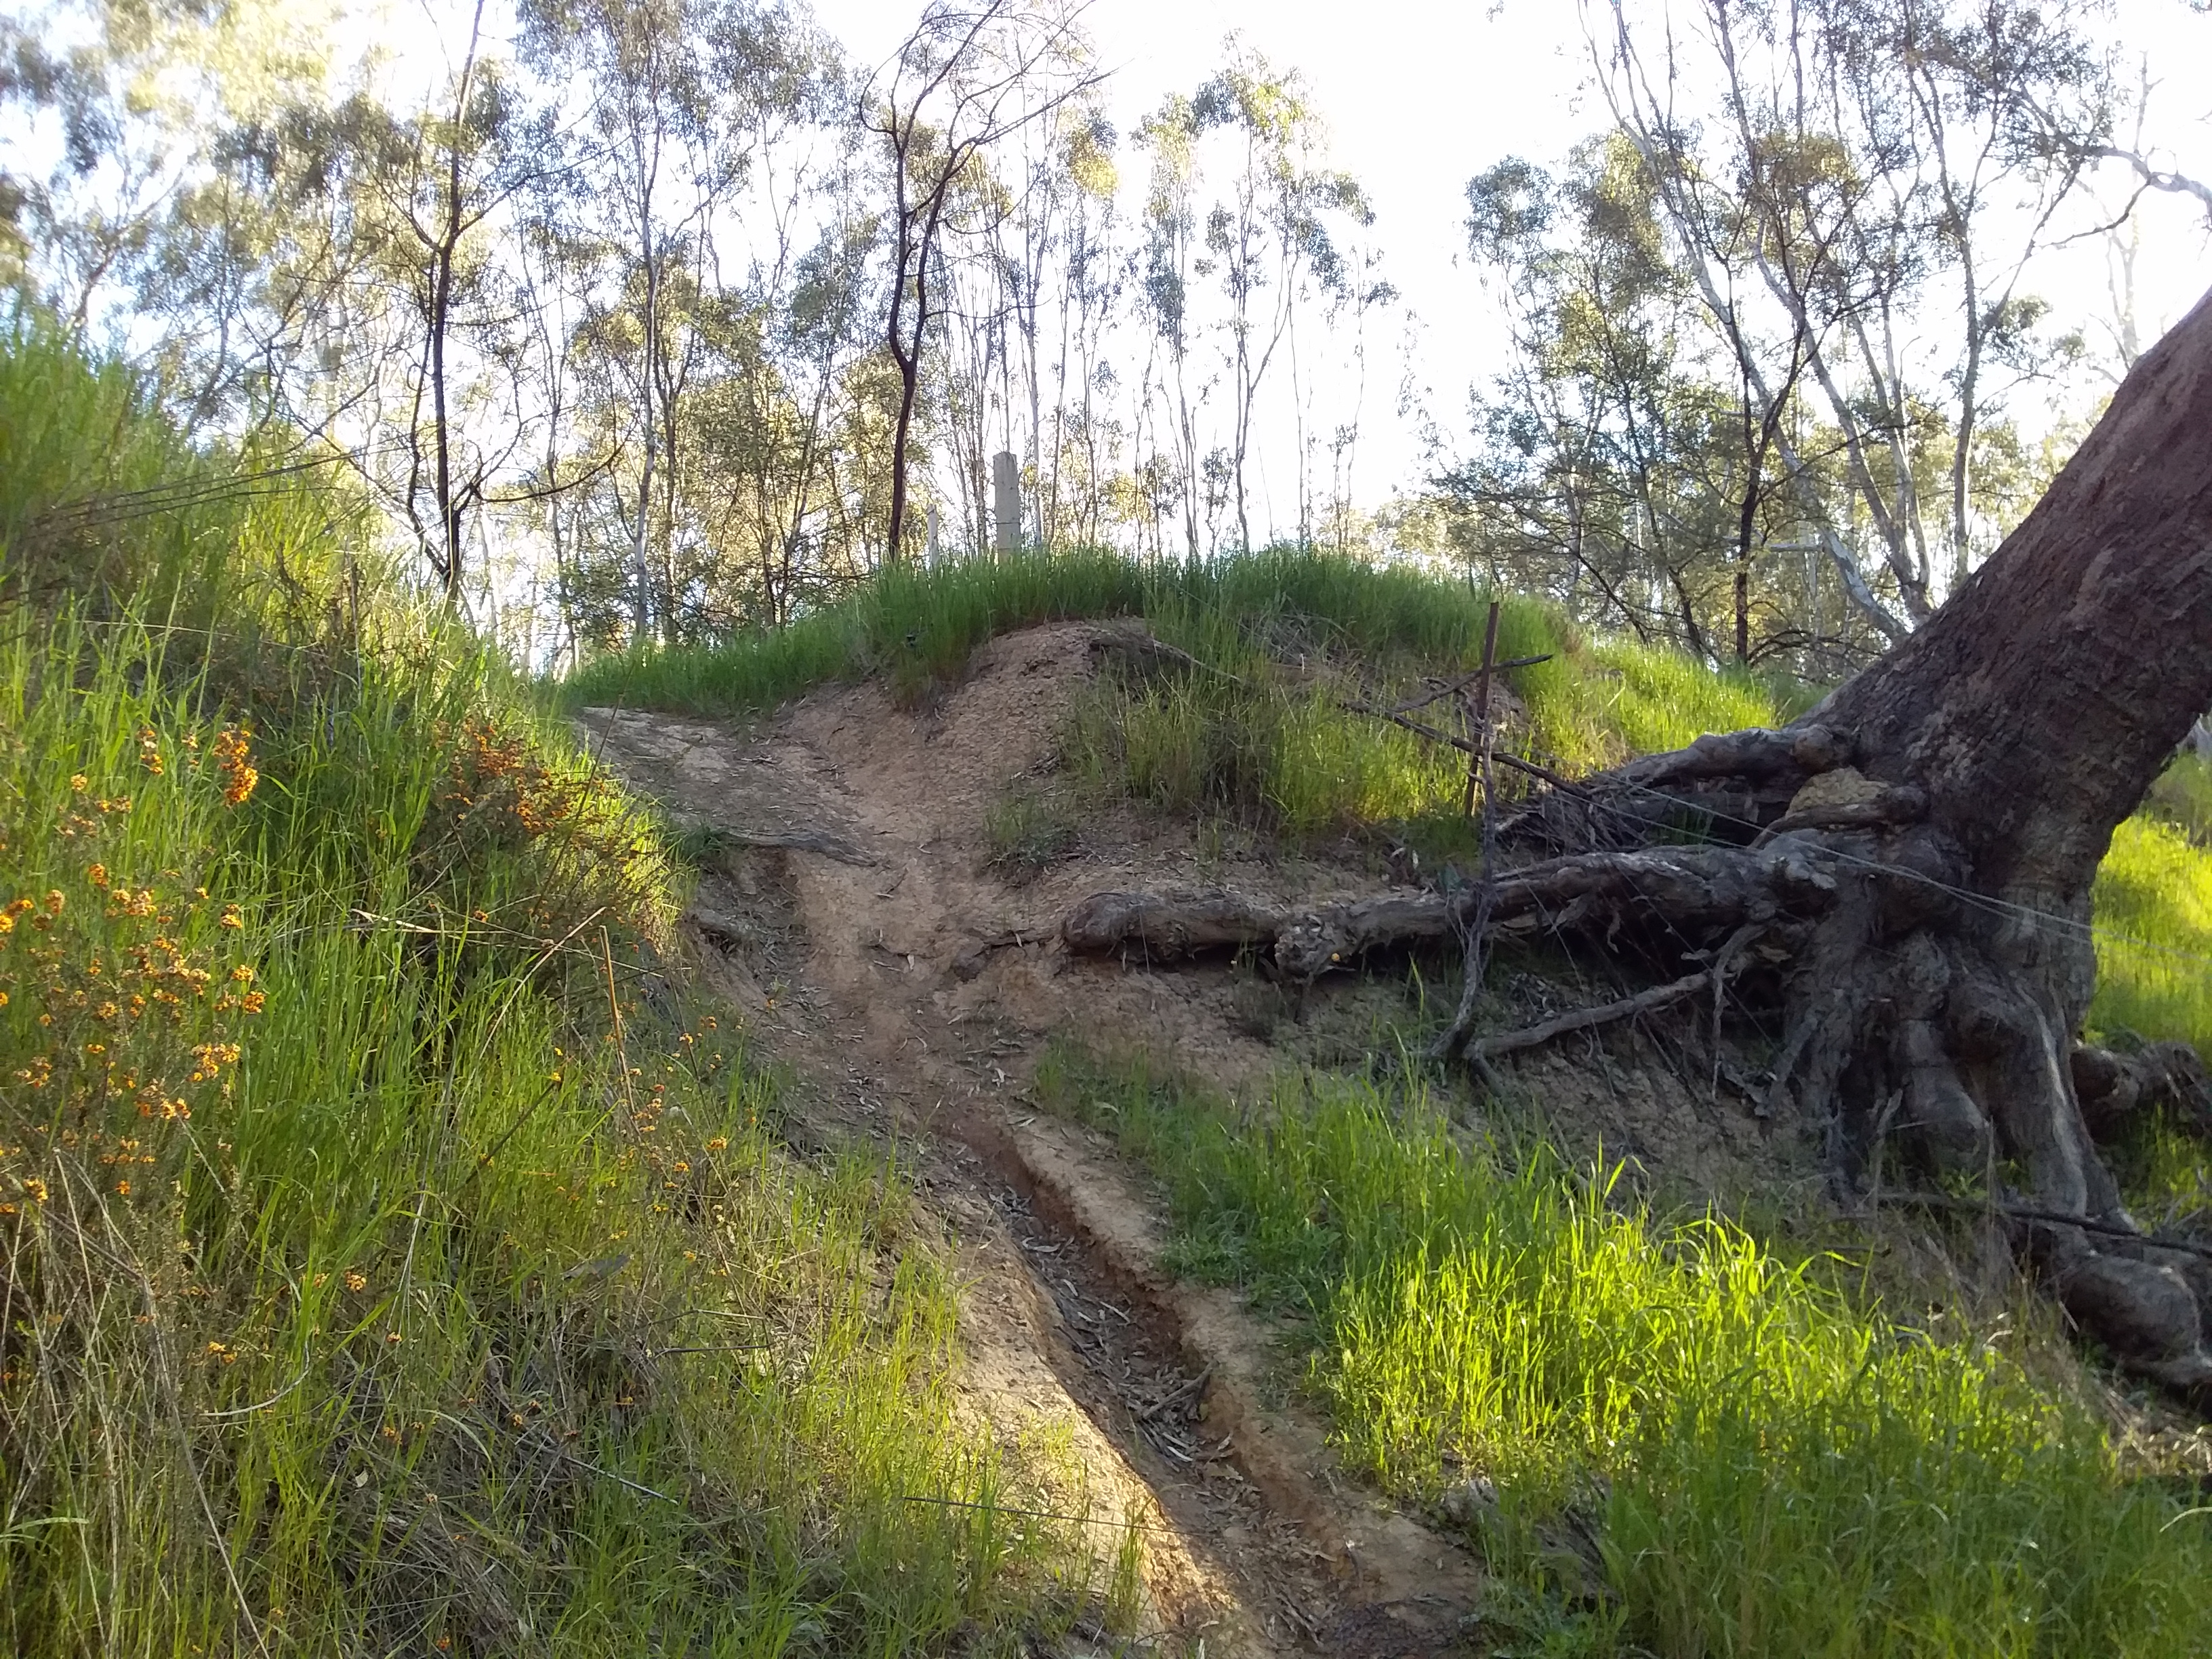
Gully 4
I’ll start at the southern end because Gully 4 is the most difficult. Firstly, this is the only one of the 4 gullies where there is a detour around it.

The blue Yellowbelly Track-Roads gpx detours around Gully 4.
However, the detour is about 2 km longer, and you will miss a scenic part of the river tracks and instead ride 2 km on a busy main road.
The problem with Gully 4 is the southern bank of this gully is too steep for a solo rider to negotiate easily.
To help riders understand why, I asked chatGPT to explain sliding on a slope to a 12 year old. This is what it came up with –
Imagine you have a block that you want to slide up a ramp. If the ramp is very steep and the block is heavy, it might be hard to slide the block up the ramp. This is because the force of gravity is pulling the block down the ramp. Meanwhile, another force called friction is pushing back on the block trying to stop it from sliding down the ramp.
The amount of friction force depends on a few things. If the ramp is rough, it will provide more friction and help the block stay in place. If the block is very heavy, it will need more friction to stay in place as well.
Also, the more of the ramp the block touches, the more friction it can get. If only a small part of the block touches the ramp, there won’t be as much friction to stop it from sliding down.
So, if you want to slide the block up the ramp, you need to make sure it’s not too heavy and that it has good contact with the ramp. If the ramp is too steep, the force of gravity might be too strong, and the friction might not be enough to stop the block from sliding down.
When will your foot slide down a gully slope?
| Influencing Factors | Your Foot Slides if | Your Foot doesn’t slide if |
| Slope | Slope too steep | Less Slope |
| Weight | Too much weight | Less weight |
| Surface contact area | Not enough contact area | More contact area |
| Surface roughness/grip | Surface too slippery | Rough surface/shoes grip |
The first thing to do when you get to Gully 4 is to put down your bike and walk through the gully and up the other side. You should be able to just walk through it OK.
You also want to find out if there is water, or a snake, at the bottom of the gully in the grass, because there is some chance you might lose control and slide down the bank when you have the extra weight of your bike in your hands.

Since you were able to walk through without your bike you know from the table above that even when you have only one foot in contact with the slope (while taking a step) the slope, your weight and the grippiness of your shoes were all adequate to avoid slipping.
But that changes when you try to move your loaded bike up or down the southern bank of this gully. Now there is extra weight. You probably will be able to hold the bike when you have 2 feet on the bank. However, when you lift up a foot to take a step, you immediately halve the area in contact with the ground surface, and the other foot will start to slide down the slope.
Slipping is less likely to happen on the northern bank of the gully because that slope is not as steep.
What are your options?
– It depends on which direction you are going
If you are heading northward towards Shepparton, this gully is less of a problem. You will be heading down the steep southern bank. Gravity will be pulling you in the direction you want to go, but faster than you would like. Most likely you will end up dropping your bike, or sliding on your butt down the slope. Then you can walk up the northern bank which is not as steep.
However, if you are heading southward towards Murchison you have a bigger issue. You have to get your bike up the southern slope and out of the gully, and gravity is not your friend going that way.
– Get another person to help
Two people can move 1 bike up the bank more easily without slipping. Together they will always have 2 feet in contact with the ground, and sometimes 3 or 4 feet. So the surface contact area is always big enough to stop slipping.
Obviously, this isn’t much help if you are solo.
– Push your bike ahead or throw it out
If you are strong enough you can probably push your bike up ahead or throw it over the bank lip. However, I don’t like this option because your bike is going to land on its side and there is a chance something might bend or break, which is not a good thing when you are alone in the bush. Also the more loaded your bike, the harder it will be to throw your bike, and the harder the bike will land increasing the likelihood of damage. Finally, this option might take a few attempts, and you will be wasting energy, doing a strenuous, non-riding activity, when you still have a long way to ride.
– Increase grippiness of shoes
If you had shoes with attachable spikes or crampons these would probably provide enough extra grip to walk up the bank. However, it is unlikely many bikepackers would consider this a weight-efficient option, or be happy to pack spikes in their bags.
– Decrease the weight
You could take off your bags, but that is a pain. Even after removing all their bags, one person will struggle to get an unloaded bike up the southern slope.
A better and faster option is to use a cord pulley to take some of the weight of your loaded bike while you walk it up the slope. The key to this is to understand that the cord only needs to assist in holding part of the bike weight during the times when you have 1 foot in contact with the slope (ie you are stepping), and not when you are standing with 2 feet in contact with the slope.
Meet your new best friends …


- A concrete fence post at the top of the south bank of Gully 4.
- Approx 12 metres of 3 mm cord with a loop alien pully. Breaking strain 135 kg. Weight including bag is 77 g.
The cord is more than I need for this task. But I decided if I was going to carry a cord it should be long enough for other uses, and strong enough to hold my weight + the loaded bike.
This is the method I suggest riders use to get their bike up the southern bank of Gully 4. This method is quick, not reliant on strength, and there is a low risk of damage to yourself, your bike or your packs/gear.
- Get your cord and walk up the south bank of Gully 4.
- With one end of the cord tie some sort of loop around the concrete fence post nearest the top of the bank (see pic above). Make sure you will be able to undo the loop when you are finished.
- Walk back down the slope into the Gully, letting out the cord as you go.
- Pick up your bike. Keeping the rest of the cord in one hand, start walking with your bike up the slope until it starts to get a bit steep.
- Wrap the cord around the top of your seat post (between the seat and the frame) 3 or 4 times. Pull the cord tight so it is taut all the way to the fence post. Hold the cord taut with one hand and test if you can let go of your bike with the other hand. The bike should stand by itself with you holding the cord tight with one hand, and all the weight being held by the fence post.
- Still holding the cord tight (so the post holds the bike weight), walk up the slope till you are a bit ahead of the handlebars of the bike. Just walk, don’t try to move the bike while you are walking.
- Get good footing with both feet (and don’t move them). Then pull the bike by the handlebars and frame up the slope until the seat gets level with your position. The cord doesn’t have to be tight when doing this, you can just hold the cord in one hand while you are using that hand to pull the bike. You are holding all the weight of the bike during this phase.
- Now repeat – pull the cord tight around the seat post and hold it tight with one hand. Test if you can let go of the bike again.
- Then walk up to a position ahead of the handlebars again, holding the cord taut as you go.
- Plant both feet with good footing and pull the bike, starting with the handlebars until the seat is level with you again.
- Keep repeating this till you can step over the top of the bank with your bike. Each repeat of the sequence will move the bike about the distance between your seat and your handlebars. Three times should be enough to get you through the steepest part of the slope.
- Have a drink of water, collect your cord and pack it in your bag. Then be on your way.
What about going down the southern bank slope?
I suggest using a similar approach. Only this time your bike will be facing down.
- Still wrap the cord around the seat post and pull it tight when you want the bike to stay still while you change position.
- Then stand at the handlebars and let the cord out as the bike rolls down the slope until the seat gets to you.
- Then repeat until the slope is more manageable.
Gully 3
Gully 3 is a much easier task, even for solo riders. Some will ride through, others will be more cautious and walk through.

Perhaps the only risk here is for clipped-in riders who decide to just roll through casually and then stall on the up-slope on the way out. Oops!
Gully 2
Again Gully 2 is manageable even for solo riders. It is a lot wider than the other gullies, although that doesn’t make it any more difficult to cross.
Some riders will ride, others will walk their bikes through.


The southern bank (shown in both the pics above) is steeper. It is easier to roll down it (if you are heading northward), rather than pedalling up it (if you are heading southward).
Gully 1
There are two places to cross gully 1. These are about 20 metres apart along the gully.
Check the West crossing first (pic below). If this is dry, then cross here.

.
If the West crossing is wet or muddy, then go about 20 metres east to the East crossing point. This has a stone ford (see pic below). The stones should be above water level and you can slowly step your way across while holding your bike.

.
That’s it. 4 gullies, all manageable even for solo riders.
.